Hydrogen Shopify – WordPress Integration

Shopify’s Hydrogen framework is a powerful tool for building custom storefronts with React. But what if you’re already using WordPress for content management? Integrating WordPress into Hydrogen can be a game-changer, allowing you to combine Shopify’s robust ecommerce features with the flexibility of WordPress. In this guide, we’ll walk you through how to set up this integration step-by-step, using Shopify’s Hydrogen with WordPress as the CMS.
Step 1 – Enable GraphQL on WordPress
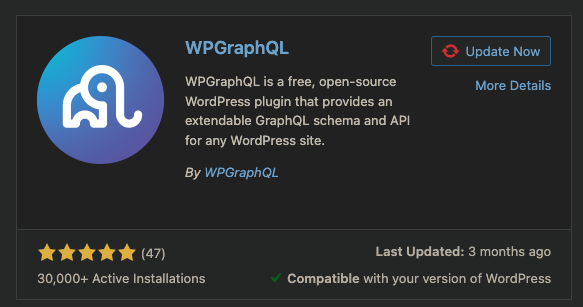
1. Install WPGraphQL
- Go to the WordPress dashboard, navigate to Plugins > Add New and search for “WPGraphQL.”
- Install and activate the plugin.
- Once installed, navigate to GraphQL > Settings to review the configurations.
- Take note of your GraphQL Endpoint for example: https://blog.example.com/graphql

Step 2 – Create Custom Types in WordPress (Optional)
If you’re using TypeScript, creating custom types becomes optional as TypeScript can handle types directly in your code. This is especially useful when working with the data retrieved from WordPress, as TypeScript allows you to define interfaces to manage data structure effectively.
// /app/lib/fragment.ts
  fragment MenuItem on MenuItem {
    id
    resourceId
    tags
    title
    type
    url
    resource {
      ... on Collection {
          id
          __typename
          image {
            url
          }
        }
      ... on Product {
          id
          __typename
          featuredImage {
            url
          }
        }
      }
  }
// /types/Wordpress.ts
export interface BlogListItem {
    title: string;
    id: string;
}
Step 3 – Create a new third-party API client
At this point, we are just following the docs recommended by Hydrogen. You can check it out by going to this link. Create the WordPress API client and be sure to change the API endpoint to your WordPress Graphql Endpoint.
// /lib/services/wordpress.server.ts
import {createWithCache, CacheLong, type WithCache} from '@shopify/hydrogen';

type AllCacheOptions = Parameters[1];

// create a static variable to store the url
const url = 'https://example.com/graphql';

export function createWordpressClient({
  cache,
  waitUntil,
}: {
  cache: Cache;
  waitUntil: ExecutionContext['waitUntil'];
}) {

  const withCache = createWithCache({cache, waitUntil});

  async function query(
    query: `#graphql:wordpress${string}`,
    options: {
      variables?: object;
      cache: AllCacheOptions;
    } = {variables: {}, cache: CacheLong()},
  ) {
    return withCache(
      ['wordpress', query, JSON.stringify(options.variables)],
      options.cache,
      async function () {
        // call to the API
        const response = await fetch(url, {
          method: 'POST',
          headers: {
            'Content-type': 'application/json',
          },
          body: JSON.stringify({
            query: query,
            variables: options.variables,
          }),
        });

        if (!response.ok) {
          throw new Error(
            `Error fetching from wordpress api: ${response.statusText}`,
          );
        }

        const json = await response.json<{data: T; error: string}>();

        return json.data;
      },
    );
  }

  return {query};
}
Step 4: Create the API client and pass to the Remix context
In your server.ts file, add the WordPress API client to the Remix context.
// /server.ts
      // rest of the code
      const waitUntil = executionContext.waitUntil.bind(executionContext);
      const [cache] = await Promise.all([
        caches.open('hydrogen'),
        AppSession.init(request, [env.SESSION_SECRET]),
      ]);

      const wordpress = createWordpressClient({
        cache,
        waitUntil,
      });

      /**
       * Create a Remix request handler and pass
       * Hydrogen's Storefront client to the loader context.
       */
      const handleRequest = createRequestHandler({
        build: remixBuild,
        mode: process.env.NODE_ENV,
        getLoadContext: () => ({...appLoadContext, wordpress}),
      });

      // rest of the code
Step 5: Query and render the list of entries
The last step is updating the existing blogs page of Hydrogen.
// /routes/blogs._index.tsx
import {json} from '@shopify/remix-oxygen';
import {useLoaderData} from '@remix-run/react';
import {CacheShort} from '@shopify/hydrogen';
import { MainContext } from '~/types/MainContext';
import { BlogListItem } from '~/types/Wordpress';

// Fetch and return API data with a Remix loader function
export async function loader({context}: MainContext) {

  const {posts} = await context.wordpress.query(BLOGS_QUERY, {
    cache: CacheShort(),
  });

  return json({posts});
}

// Render the component using data returned by the loader
export default function BlogList() {
  const {posts} = useLoaderData();

  return (

      Blog List
        {posts.nodes.map((post: BlogListItem) => {
            return
                {post.title}

        })}

  );
}

// Query the API for a list of characters
const BLOGS_QUERY = `#graphql:wordpress
query GetAllBlogs {
  posts(first: 100) {
    nodes {
      excerpt
      id
      slug
      title
      content
    }
  }
}
`;
References: Fetch third-party API data with Hydrogen